Showing posts with label SimpleSSB. Show all posts

Saturday, December 4, 2021

Furlough 2040 Supercharged - Final Bench Test

I've spent the last few weeks putting the finishing touches on what has become the Furlough 2040 Supercharged SSB transceiver.  Originally designed and designated the SimpleSSB by my friend and elmer N6QW Pete Juliano I have extended and supercharged his excellent modular design in a number of ways.  The final (although Pete advises you should probably never say 'final' when talking about a hombrew rig) configuration is as follows:

  • 20 Watt SSB and digital dual band transceiver for 20 and 40 meter bands
  • Arduino Nano Every microcontroller and SI5351 clock generator
  • 9 MHz IF - filter 
  • Nextion Color Touch Screen Display
  • AGC and S-Meter
  • 3 stage Tx amplifier chain, 2N2219A 1st driver, IRF-510 driver stage generating 1-2 watts driver for the 20-watt push pull RD16HHF1 push-pull final amplifier designed by EI9GQ Ed Skelton
  • Firmware includes full CAT control for digital modes, frequency scanning, persistent frequency and mode memory stored in EEPROM
  • Custom enclosure with a CNC cut front panel


KK4DAS Furlough 2040 20-Watt SSB and digital mode transceiver

Walkthrough of the transceiver and the final bench test:


Here is a look at the voice modulation envelope:


And a few more pictures to wrap it up:

Final Bench Test


Final assembly in the enclosure - two levels - Tx board on top


On the air peaking 16 watts SSB phone.


This has been an incredible 2-year learning journey.  Many thanks to Pete and also to Bill Meara N2CQR of the SolderSmoke podcast who started out humoring me as I built my Michigan Mighty Mite and have become great friends.  Also, many thanks to the members of the Vienna Wireless Society Makers group who joined me on the journey at the beginning of the year and we now have about 15 more SimpleSSB transceivers on the air.  Watch this space for more on the VWS maker group progress including KA4CDN, Mike's addition of CW just completed yesterday!


Michigan Mighty Mite - December 2019

73 from Great Falls,
Dean
KK4DAS

UPDATE - For those interested in building a similar rig you should know that this is not a kit nor is there a single master schematic or bill of materials. The vast majority of the components are common resistors, transistors, capacitors, voltage regulators, etc. This is a modular build with each module built and tested and integrated as you go along.  Each module is well documented and by virtue of the Vienna Wireless Society Makers group build there is a great set of documentation and examples for each module.  Where particular components are required (ADE-1 Mixers, SI-5351 clock module, etc) they are called out in the documentation below. 

For builders, I highly recommend you build the original SimpleSSB as specified below.  This is a 10 transistor, Arduino controlled 5-watt SSB phone and digital mode rig for 40 meters.  Once you have the basic rig built then decide which enhancements are right for you.

Build references:

Tuesday, October 5, 2021

EI9GQ 16 Watt Power Amp - Start to Finish

QRP is great and by far my favorite way to operate - especially since completing my scratch-built Furlough 20/40 QRP SSB and digital mode transceiver.  But as my friend Pete, N6QW says, "some days you just want to put on your big boy shoes."    For "big boy shoes" for the Furlough I chose to build the  Eamon Skelton, EI9GQ 16 watt power amplifier from his book "Building a Transceiver".  The amp uses dual Mitsubishi RD16HHF1 transistors in a push pull configuration.  This was my first attempt at anything beyond the SimpleSSB IRF-510 amp that I used in the Furlough.   EI9GQ's books is a good reference and there are several other builders who have documented their builds online.  Here's mine...

Beginning with the schematic - I used EI9GQ's specification.  The transformers gave me pause and I had to really "noodle" over their construction.    In addition to figuring out the windings and interconnections, if you read the article EI9GQ recommends torroids and shielded wired that do not seem to be available anymore.   For transformer T3 he specifies HEM3011 torroids, I substituted two FT50-43s glued together for each side of the transformer,  I also just used #26 AWG for the bifilar turns rather than the shielded audio cable that he recommended.

The next thing to do was to figure out the transformer windings and start to think about layout.  Using my primitive graphic arts skills I sketched out each transformer and carefully number the wires.  This proved very helpful when it came to construction.  Here you can see my layout and tentative parts placement on the top of the heat sink. I made the board about 1/2" longer than the heat sink in both directions to allow for overhang of the SMA connectors I intended to use.


I've been using a CNC mill to carve PCBs for Manhattan style builds for a while  and I do my layout in a free program called  Carbide Create.  It's fairly easy to use and combines the editing package with a G-code generator to produce the program for the CNC mill.  Here is my layout.


I always print an an actual size image of the board to check for part fit.  This save a lot of time and wasted PCBs if the parts don't fit.  For this build I milled the traces for the voltage regulator and bias trimmers, cutout the center square for the transistors and drilled some mounting holes.  I decided to wait until construction time to attach Manhattan pads for the components. EI9GQ used mostly u\Ugly construction with all the non-ground connections in the air.  I prefer a pad to solder to most of the time but this time I kept my options open. I ended up doing some Ugly construction and some on pads.


Once I was happy with the layout it was time to fire up the mill and get carving.  The PCB carve took about 20 minutes.  Enough time for a cup of coffee and to contemplate life.


Next up - drilling an tapping holes to attached transistors and PCB to the heat sink.  Two trips to the Depot - one for the #6/32 tap and one for the tap handle since my other one didn't clamp down on the small tap.


With the PCB attached to the heat sink it was time to start laying down parts.  I started with SMA connectors, transistors and DC bias circuits - leaving the exact placement of the transformers until I had a better feel how everything would go.  My only wiring mistake is visible in this next picture.  I had soldered the 8 volt regulator in backwards,


I glued down a few hand cut Manhattan pads and soldered up all the components on the input side of the the amp. I attached the input coils.  At this point the amp was about 90% complete - I just had to attach T2, the DC wiring for the drains and T3.  And also to maker sure I got the transformer connections right.


Amp done and ready for testinng.


And here is a demo of the recreated smoke test.  Much to my delight, after correcting the orientation of the voltage regulator that amp worked straight away.  With the transistors biased at 500mA each I measured just over 13dB flat across the entire HF amateur radio spectrum,


The next step will be to replace the IRF-510 stage of my Furlough with this amp and see how it works on the air.  As I mention at the end of the video I suspect I'll need to add another driver stage to get enough drive for the full 16 watts.

After close to two years of working on projects I'm starting to realize that Pete's adage - "if you know stuff, you can do stuff!" is really true.  It has been a steep knowledge climb for me - but I'm starting to feel it.

73 from Great Falls

Dean

KK4DAS

Friday, April 16, 2021

Homebrew Lives - Furlough 40 / SimpleSSB Transceivers on the Air


It has been too long since the last update but I have some exciting news and also a classic homebrew “tale of woe” to share.

First, my friend Mike KD4MM, here in Vienna, VA was the first member of the Vienna Wireless Society Makers group to complete the receiver side of N6QW, Pete Juliano's SimpleSSB transceiver – check it out:


Mike shared his progress with us and also this demonstration of decoding FT8 with simple audio coupling:


And the tale of woe shared by Don, KM4UDX, reminds us that not everything goes smoothly when building a homebrew transceiver.  He reminds to “Don’t do what Don Did!”


It has been just over a year since I completed my initial build of the Furlough 40 with much coaching and assistance from Pete. Mike and Don are two out of 20  members of the Vienna Wireless Society Makers group that is working on a group build the SimpleSSB project as enhanced by me to include features like CAT control for digital modes.  Beginning about six weeks ago the group is progressing module by module per SolderSmoke best practice advice.  We started with the audio amplifier, followed that with the Arduino/SI-5351 based controller module and the builders are just completing the IF module.  This week at our weekly meeting, Mike proudly showed off his success.  

Pete was gracious enough to provide tribal knowledge and encouragement to the group a view weeks ago:


The group is generating a ton of great material on the project including photos and videos of the in-progress builds, technical documentation, test equipment, procedures and more.

Here just a few pictures of the in-progress builds


Audio Amplifier by Leon, NT8B

Arduino / SI 5351 Controller by Mike, KA4CDN


Front Panel by Leon, NT8B

Front Panel Assembly by Leon, NT8B

IF Module by Mike, KD4MM


Another take on the IF by Don, KM4UDX

You can follow the group's progress on the VWS Makers Group SimpleSSB Project page.

Just think of this – in another couple of weeks we may have as many as a dozen SimpleSSB transceivers on the air…..we are giving serious competition to the big rigs everywhere.

And a very warm welcoming of to the new members of the much sought after, rarely granted membership in to the International Brotherhood of Electronic Wizards.

73 from Great Falls,
Dean
KK4DAS

Monday, August 3, 2020

A Touching Display for the F40 and ISS APRS Adventure


Nextion Touch Screen Display for the F40

Hi all - 

I've been working steadily on the revising the Arduino code for the Furlough 40 Homebrew 40 meter SSB phone transceiver that I built earlier this year based N6QW, Pete Juliano's Simple SSB.  Last time I described the code for a color TFT module to use as a replacement for the 4x20 LCD that I originally used and I promised to upload additional modules.  The code for a fully functional ham radio control program is complete.  I need to finish documenting it and will post it to my github page.  In addition to the display module already posted I plan to post on each of the remaining modules required to produce a fully functional SSB control program including the SI-5351 produced LO and BFO clocks.   This control program should be straightforward to adapt to a variety of homebrew radio projects.  The modules that I will be provide and document are:
  • Display Modules 
    • TFT Display
    • Nextion Touch Screen Display
    • 4x20 LCD Display
  • Button Handler (hardware buttons and switches) 
  • Encoder - handles the rotary encoder and push button
  • VFO / BFO -  controls the SI 5351 clock generator
  • CAT Control
Each posting will follow the format of Furlough 40 Goes Color 

But that is all is in the future.... 

Very Touching - Nextion Display

While I was putting the final touches on the CAT control code for the F40 I received an email from Pete asking me about programming a Nextion Touch Screen display.  I had a spare in the junk box.  I had purchased two when I upgraded my uBix V6 to the wonderful uBitX Nextion module provided by KD8CEC, Ian Lee.  That upgrade was plug and play since KD8CEC provided all the code. When I got Pete's email I loaded up the Nextion IDE and cobbled together a "LED On, LED Off"  sketch which is the Arduino version of "Hello World."   The Nextion IDE and  programming library are available for free on the Nextion web site.  It requires a bit of fiddling and a learning curve to get it going and I will fully describe in a future post. I sent off the code to Pete and he asked about how to include a frequency display.  I did that in about five minutes and that inspired me to try to build the F40 user interface. Since I had recently completed the TFT Display Module I already knew what functions I needed to implement for display side of the interface.  As a reminder, the display functions are things like:
  • DisplaySetup
  • DisplayActVFO
  • DisplayAltVFO
  • DisplayVFOAB
  • DisplayTxRx
  • DisplayMode
  • DisplayIncr
  • DisplayTune
One of the cool things about the Nextion IDE is that it allows you to build and simulate what you will eventually see on the screen - and it is all drag and drop with very little programming is required. The Nextion communicates with Arduino Sketch via a simple protocol running over a serial interface. 

Since I already had two working display modules built (for the 4x20 LCD, and for the color TFT) I already knew what I needed.  Within about two hours I had fully reproduced the functions of the color TFT display.  Buttons and switches are also easy to implement;  a couple of hours later I had reproduced the front panels switches from the F40 - VFO A/B, LSB/USB, and TUNE.  That was another couple of hours. So in about half a day I had created a fully functional touch screen display for the F40.  The only physical change to the F40 was disconnecting the LCD and connecting two wires to the Arduino plus power. Not bad at all!

Based on that success I began work on extra features that I had put off adding to the F40 because they would require either complicated menus or a bunch of other hardware buttons.  The first thing I added was the ability to work Split (transmit on one frequency and receive on a different frequency).  One button (five minutes) - and about 30 minutes to write the code on the Nano to switch the clock frequencies on the SI5351.  I previously described my approach to modular programming and since I had already written the VFO/BFO control module it was a matter of a few minutes to code that up.  I then added a Scan button to scan through frequencies and this was interesting - I was able to add that function by just making changes on the Nextion  - no Arduino programming required.  

More on Nextion programming later - but for now, please take a look at the video and let me know what you think in the comments.

APRS and the International Space Station

KM4HRR Talks to the ISS

On Sunday, my friend KM4HRR Brendan invited me to see the progress he has made in contacting the ISS using APRS.  His setup is the following:

  • Kenwood TH-D74 Transceiver, with an ISS profile that he created
  • Arrow II Portable Antenna
  • iPhone (or Android) running the ISS Detector app
At about five minutes before the pass, ISS Detector sent an alert.  Then, using the iPhone camera, also controlled by ISS Detector, he pointed the antenna at the horizon.  Right on time, he received an APRS beacon from ISS and over the next few minutes Brendan sent and received several APRS messages.  He had added several macros to his ISS profile on the TH-D74 to make it easy to send messages during the 5-6 minute pass.

All in all, a pleasant way to to spend and hour.  I now may have to invest in an APRS capable HT!

Farewell Neowise, we barely knew ye....

In keeping with the space theme, when I am not playing radio, I play photographer - and here are two of my favorite captures of comet Neowise at nearly its closest approach to earth.


73 from Great Falls,
Dean
KK4DAS

Friday, April 24, 2020

Furlough 40 Hears the World


I'm still working on tuning up the transmit side of the transceiver to see if I can get a little closer to designer N6QW, Pete Juliano's 5 watt specification, but in the meantime I decided to checkout the performance of the receiver.

I ran a weak signal propagation receive test overnight to see how well the receiver is working.  The image all the stations I heard over about 12 hours.  I'm located in Northern Virginia, just outside of Washington DC and I heard stations from Australia and New Zealand. This is a pretty sensitive receiver! Kudo's to Pete for the terrific design.

If you haven’t checked out WSPR,  it is one of the digital modes that I like.  It uses signal processing software from Nobel Prize winning Princeton physicist Joe Taylor.  It is a great way to analyze your station’s reach both in receive and transmit.

The software is available here - https://physics.princeton.edu/pulsar/K1JT/wsjtx.html 

The same software also supports FT8 and other weak signal digital modes. 

The only thing I needed to do to use the software on receive was plug the rig’s phone output into the mic input on the laptop and tune the rig to the 40 meter WSPR frequency on upper side band.  The software does all the work.  Its time based, so you PC’s clock needs to be sync’d pretty close to internet time. 

All stations that run WSPR have the option of uploading the signals they hear to WSPRnet.org, and the WSPRnet database is open and searchable.   The web site I used to produce the map is at http://wspr.vk7jj.com/.  If you use WSPR you should check it out - this is just one of many tools to allow to check your rig's performance,  test new antennas, and so on.  I let WSPR run in receive mode over night and looked at the results this morning.

In order to test how well I am getting out on transmit I need to get some sort of keying control built for the rig – either through integrating CAT control into my Arduino control program – or using serial port keying through a USB interface.  So, in addition to tuning up the transmit circuits, this will be one of my next projects.

73 from Great Falls
Dean
KK4DAS

Tuesday, April 21, 2020

Furlough 40 - First Ragchew - Homebrew to Homebrew

As promised -

Here is the first extended QSO of the Furlough 40 (and the 4th contact ever).  As a reminder the Furlough 40 is a 100% homebrew transceiver based on the SimpleSSB designed by N6QW, Pete Juliano and built by me - with much coaching from Pete and occasional help and advice from my brother Chris, W6CS.  Both of them are in California and I am in Virginia - so a first QSO with either of them was not in the cards.  When I scheduled this QSO I had no idea if I would be heard at all.

This QSO is with my friend Don, KM4UDX. What makes it even better is that I worked Don on his highly customized, homebrew enhanced uBitx, with which has taken Don to the top of the WSPRNet leader board.  Homebrew to homebrew.

So this was great fun. Have a look and a listen:


Coaxing the rig to life board by board has been a great experience.  Pete's guidance was to build one module at a time, starting with the audio amplifier and that forms the test bed for the next module. That proved to be great advice when debugging the latter stages. I was warned by my other Elmer, N2CQR, Bill Meara that when I got to the final amplifier I would be entering "a world of woe" and it did take a week or so to shake out - with each day starting out with a promise that "this will be the day..." and each evening ending with "perhaps tomorrow..."  But gradually the bugs got fixed, the errors corrected and the rig is on the air.

The rig is on the air but not finished.  Next step will  be going through the modules board by board to see if I can get closer to Pete's 5 watt specification.  And then there are a few final touches I need to complete.  I need wire up the tune circuit add a few more controls and build a proper front panel.  And at some point think about moving it to an enclosure - or maybe not.

But at the moment, I don't want to touch a thing!

As a Scoutmaster of many years I frequently had to remind my Scouts to take a moment and look back at the mountain they had just climbed.  This picture with the storied Michigan Mighty Mite, a 7 component first homebrew project,  was taken exactly four months ago on December 22, 2019


Testing the Michigan Mighty Mite - 4/22/2019
73 from Great Falls,
Dean
KK4DAS

Sunday, April 19, 2020

Furlough 40 First Contact


It has been nearly a month since the completion of the receiver beginning to build the transmit modules.  I am super excited that this morning I had my first two confirmed QSOs.  I was putting out just over 2 watts of RF magic and confirmed two contacts in Ontario - about 400 miles from here. 

Furlough 40 First Contact - Thanks to Garry VE3XN! 
In the last month I have built the three final modules to enable the transmitter.  The second stage amplifier / TX Driver, the IRF 510 based final amplifier and the 40 meter low pass filter. Note the fancy brass home-brew heat sink on the TX Driver, courtesy of the plumbing department at Home Depot.  As a reminder, this is my build of N6QW, Pete Juliano's Simple SSB Transceiver and inspired by N2CQR, Bill Meara and Pete's Soldersmoke Podcast. 


Furlough 40 TX Driver, Final Amp and Low Pass Filter
There is a tremendous amount of tribal knowledge in Pete's design and I'm really please I went with it for my first transceiver project, because I really, really needed that tribal knowledge to get the rig built.  There are things that a first-time homebrewer like me would never think about, like cutting the drain pin off the IRF 510 and using the tab to connect.  And using the entire PCB as the heat sink for the transistor. And Pete has been an amazing Elmer, coach, nag and grief counselor when things didn't go quite right - like when I sacrificed the IRF 510 while over exuberantly trying to coax an extra watt out of the not-quite-ready-for-prime-time-rig. The good news was, due to Pete's excellent circuit layout, it only took about 10 minutes to replace the dead transistor.


The sacrificial IRF 510 - IRF, I hardly knew ye!


I didn't get to video of the first few contacts but I will make one in the next few days so you can see the performance.   In the meantime, here is the final pre-air transmit test.


The trace shows flat-topping which means I needed to back off on the microphone gain.  After I made that adjustment the output dropped to about one watt. I tried to compensate by increasing the bias on the final and I pushed just a little too hard - at about 4.75V DC on the bias, the IRF 510 gave up the ghost.  With a little more advice from Pete I managed to get everything more-or-less aligned and am now getting 2-3 watts of output pretty consistently.  

Next step will be optimizing each module to see if I can get the output up to the 5 watt design spec.

73 from Great Falls
Dean
KK4DAS


Tuesday, March 24, 2020

Dean KK4DAS's "Furlough 40" SSB Rig


Introducing the "Furlough 40" scratch-built SSB rig:


Greetings!

I know this is beginning in the middle and the best time to plant a tree was 10 years ago, but here goes...

I'm Dean, KK4DAS.  I 've been a licensed ham for about a year and a half, although amateur radio has been part of my life forever.  My Dad, Vic W6MYE/SK was a ham for most of his adult life - at least 60 years (my age now) and it is one of the ways  I will always remember him.  My brother Chris, W6CS has been a ham fore many years and I was very happy that he and I could share the hobby with Dad.  I'm sure I'll write more about that over time, but today I have some exciting news to share.


Inspired by Bill Meara, N2CQR and Pete Juliano, N6QW, the Wizard of Newbury Park, and the Soldersmoke Podcast, for the last eight or nine months I have been on a homebrew journey that has led to the completion of the receiver side of a 100% scratch-built 40 Meter SSB Transceiver.  I've been working on it since January and thinking about it even longer.  The design I selected, after advice from Bill and Pete, was Pete's SimpleSSB Transceiver.  It is a wonderfully elegant design that uses 10 common transistors total - which one of the reasons Pete calls it "simple".  It was far from simple for me -  I should tell you that the most complicated electronic project I had built up to that time was a Michigan Mighty Mite, 7 component, crystal controlled, CW transmitter, which I actually got on the air and Bill was kind enough to blog about. I'll talk more about that project in a later post.  Although I have a technical background, it is largely in computer software and networking. I've been building and delivering complex software systems all of my adult life.  But electrical engineering was not my thing.  W6CS is an electrical engineer, but I am strictly a software guy. Until now...

I am proud to unveil the "Furlough 40" SSB rig, christened in honor of the fact that the current crisis afforded me some stay-at-home time to get the rig finished.


My original goal was to be ready by June, but circumstances have allowed me accelerate that schedule considerably. I've been documenting the project along the way and after today I will back up and tell you a little about the journey.

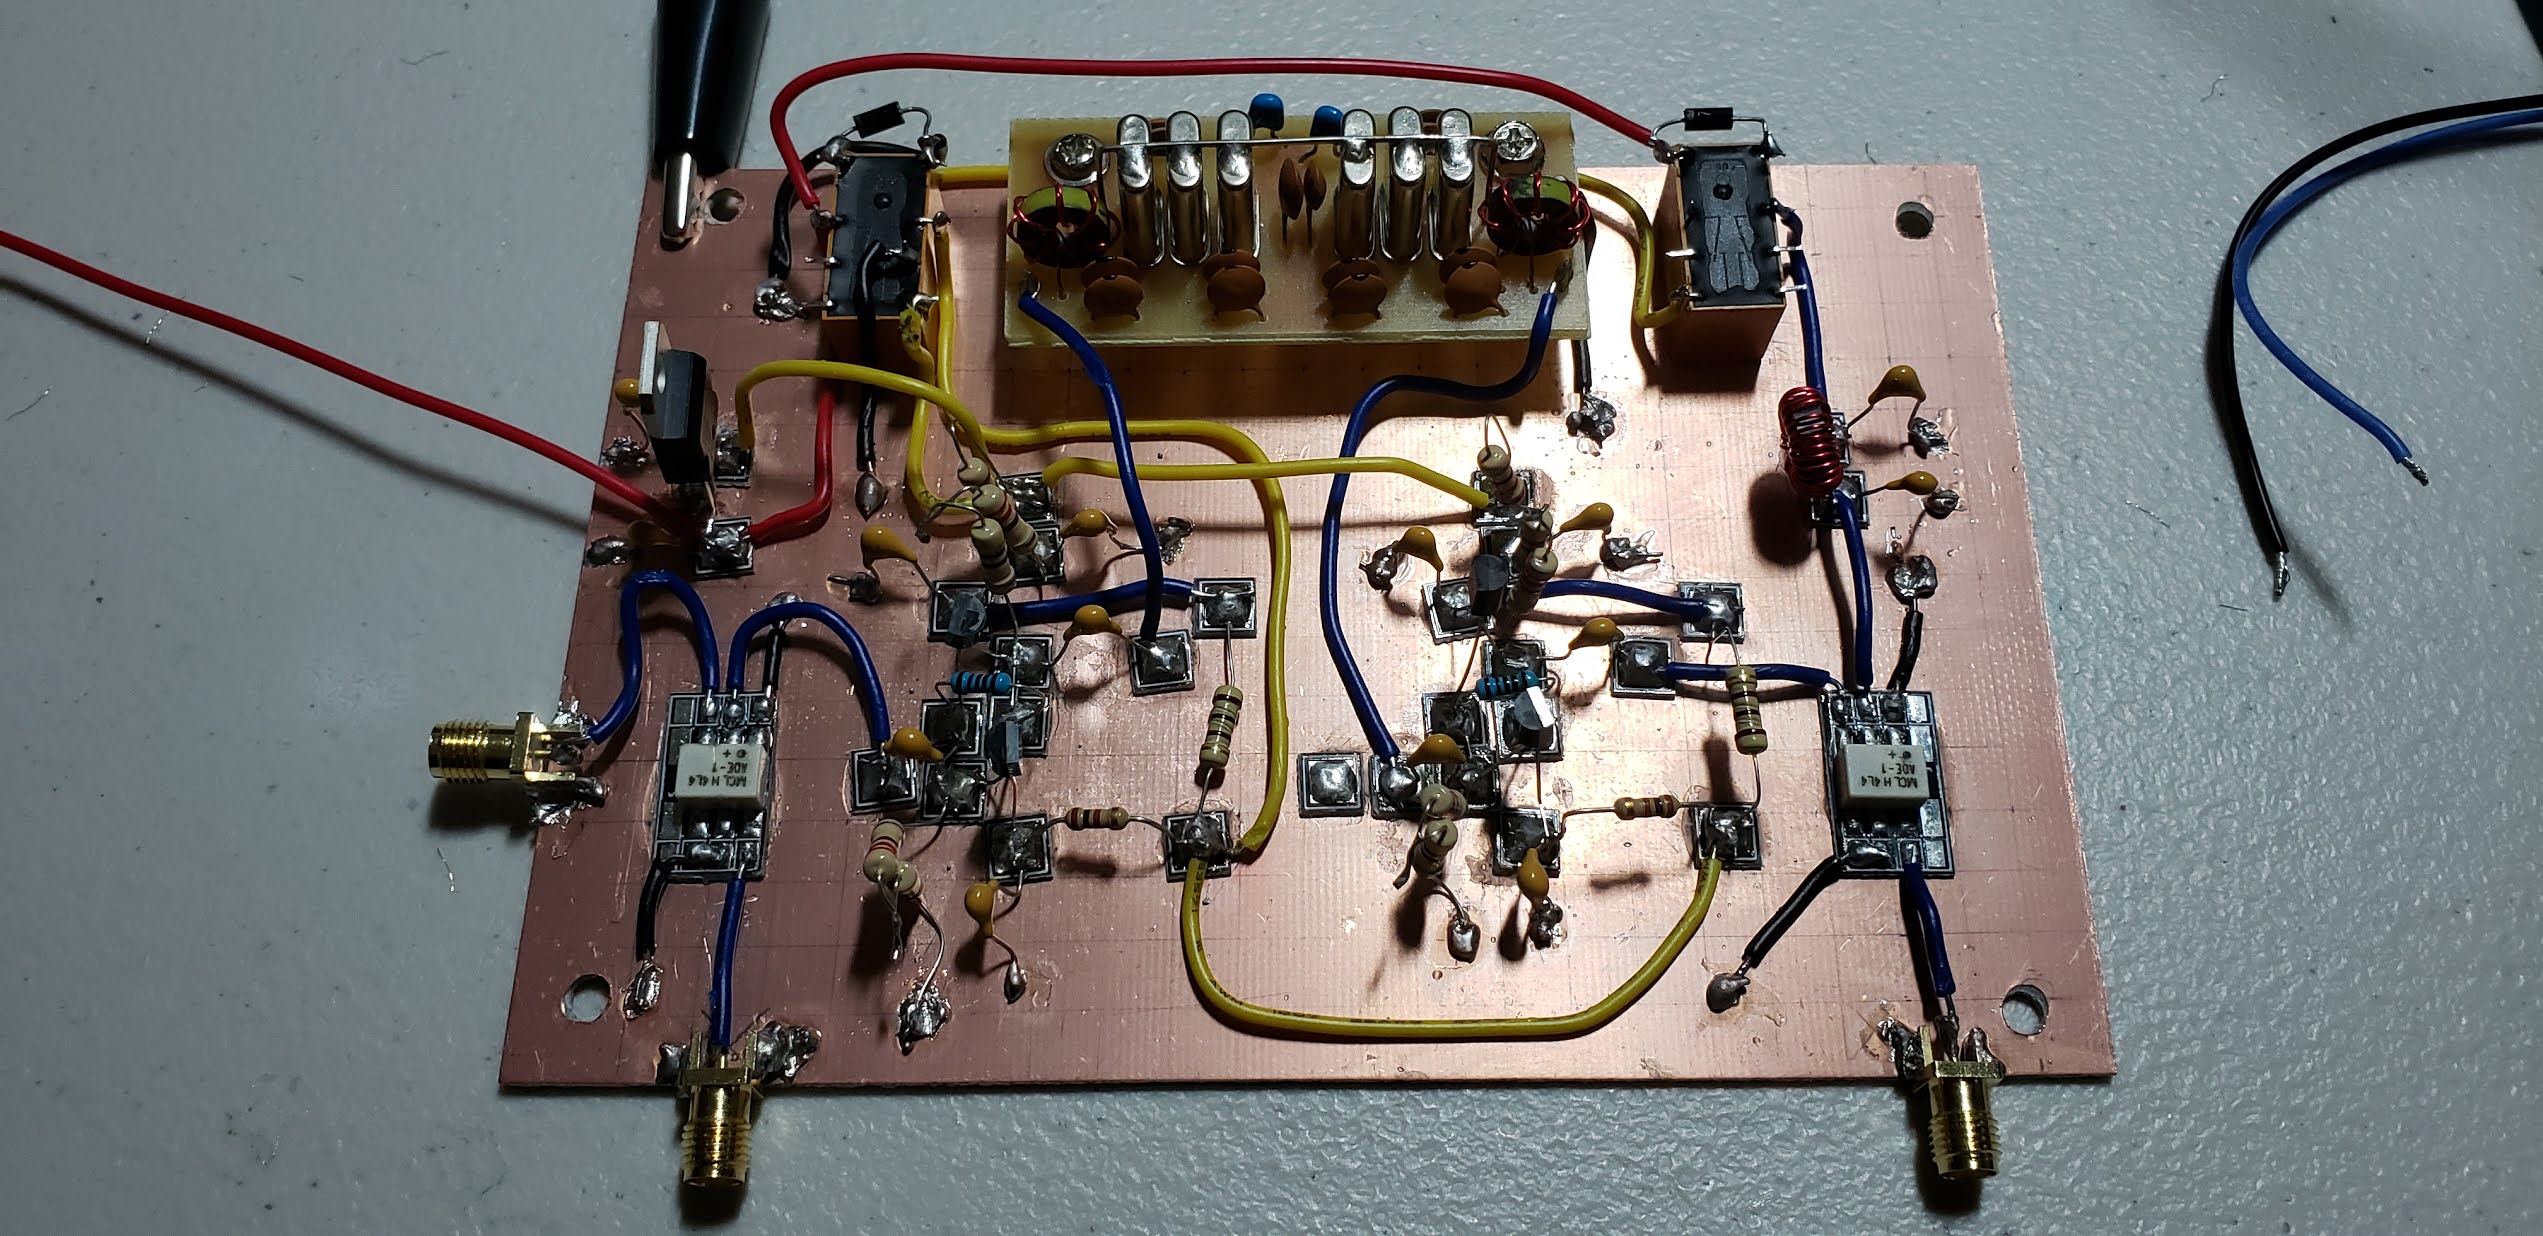
For the more technically minded the rig is a 40 Metter SSB phone transceiver.  The rig is controlled by an Arduino Nano microcontroller driving an SI 5351 clock generator for the LO and the BFO.  The IF is at 9 MHz utilizing a crystal filter purchased from the GQRP Club.  The IF is bi-directional as is the RF amplifier with relays switching between transmit and receive.  It uses two ADE-1 double balanced mixers and the bi-directional amplifiers are Pete's implementation of the Plessy amplifier design from "Experimental Methods in RF Design."  I'm building the rig in modules, per the sage advice of Bill and Pete, and testing as I go. Each working module can be used the test the next module.  The construction style is nearly 100% Manhattan style - save for the Aarduino and SI-5351.

Thanks to Bill for all of his support and thanks, especially, to Pasta Pete Juliano, master Italian Chef and the true wizard of Newbury Park.  Pete continues to patiently answer my questions and guide me through testing each module as it was completed, and gently providing encouraging instruction when I veered too far left or right from plan - even to the point of sending me a hand-drawn sketch of the bottom view of a N2219A transistor so I would know, always, how to wire it in correctly in the future.

More later, but for now - best 73s from Great Falls, VA

Dean
KK4DAS